
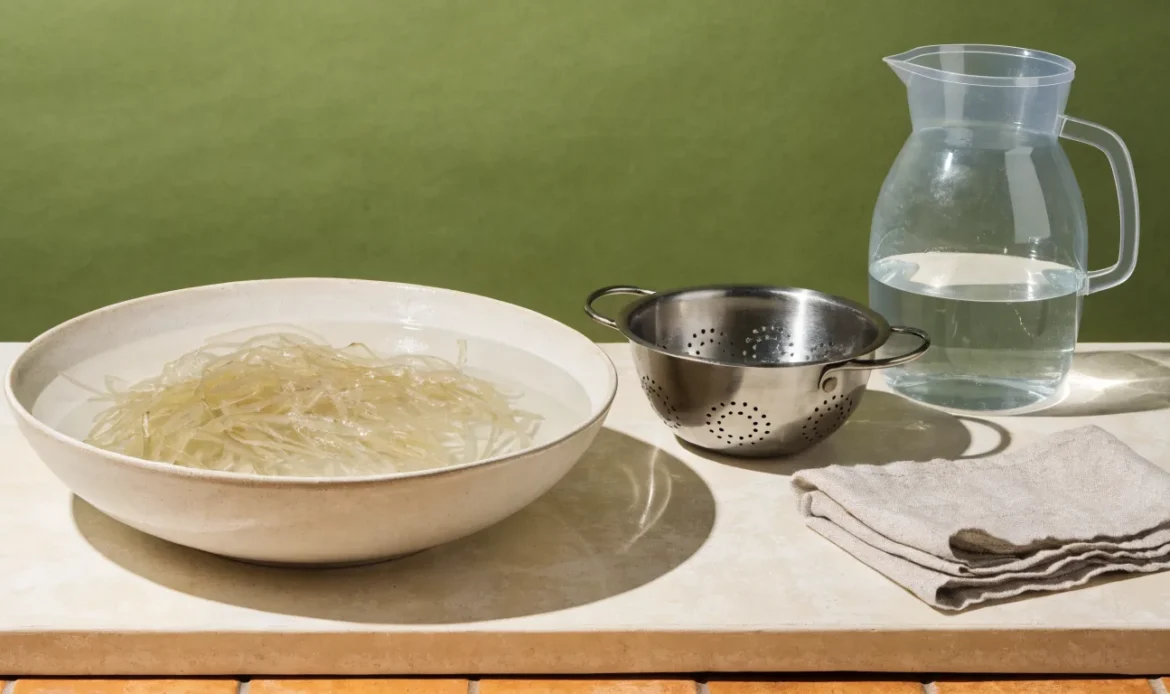
Short answer first: Rinse, soak, and inspect. For dried sea moss, rinse off visible sand and debris, soak in clean water until soft, change the water if it looks cloudy, and pick out bits of shell or seaweed. For fresh sea moss, rinse well and remove foreign matter. For gel, use clean hands and clean water, and store cold. These steps reduce surface dirt and salt. They cannot prove the sea moss is free of all contaminants. Read on for clear, step-by-step methods, a decision checklist, and what tests or questions to ask a supplier.
Why this matters
- Sea moss often reaches you dry, fresh, or as gel. Each form needs a different clean.
- Cleaning by hand removes sand, small shells, and obvious debris.
- Some risks and chemical contents (like iodine) vary by seaweed type and growing area. The content varies widely and is not fixed for all products [1][2].
- Simple cleaning does not test for heavy metals, microplastics, or bacteria you cannot see. For those, ask for lab reports or third-party testing from the seller.
How to use this guide
- Read the short steps for your sea moss form first.
- Use the checklist to decide whether to clean at home or ask for more information from your supplier.
- Follow the safety notes. If you need lab testing or have medical concerns, talk to a professional.
Contents
- What cleaning can and cannot do
- Tools and simple supplies
- Step-by-step: dried sea moss
- Step-by-step: fresh sea moss
- Step-by-step: sea moss gel and blended gel
- How to tell if your cleaning worked
- Storage after cleaning
- Decision checklist (table)
- When to ask for lab data or to avoid a batch
- Suggested visual
- FAQs
- Conclusion
- References
What cleaning can and cannot do
What cleaning can do
- Remove sand, grit, small shells, and loose plant debris.
- Reduce surface salt and some surface microbes if you wash with clean water.
- Make sea moss softer so you can blend it or cook it.
What cleaning cannot do
- Prove a product is free from heavy metals, chemical contaminants, or some bacteria.
- Remove iodine or other minerals that are part of the seaweed itself. Iodine content varies by species and location [1][2].
- Guarantee safety for sensitive people. If you need a low-iodine product or tests for heavy metals, you must ask the seller for lab reports or choose a tested product [3][5].
- Replace proper lab testing for commercial use or for people with health issues.
Why iodine matters (short)
- Seaweeds can contain varying iodine levels. That means people who must watch iodine intake should ask for details or advice. Scientific reviews and national surveys show wide variation in iodine in seaweed products [2][3][5]. Cleaning with water does not reliably lower iodine levels.
Tools and simple supplies
Keep these items handy. Use items meant for food work.
- Large clean bowl or non-reactive container (glass, plastic, or stainless steel)
- Clean, cold potable water
- Strainer or colander with holes small enough to keep moss pieces from falling through
- Clean kitchen shears or scissors
- Clean hands or food-grade gloves
- Optional: a soft brush (food-grade), a mesh tea strainer for small bits
- Clean towel or paper towels
- Refrigerator space if you will store gel
Do not use
- Soap, bleach, or household cleaning chemicals on sea moss. These can leave residues and change flavor.
- Very hot water for soaking. Hot water can change texture and some soluble components.
Step-by-step: dried sea moss
Dried sea moss is common. It looks brittle and crinkled. It needs rehydration.
- Inspect the package first
- Look for an odor. A clean ocean smell is normal. A strong rotten or chemical smell is a warning.
- Check for visible mold or strange stains. If you see mold inside an unopened, sealed package, do not use it. Contact the seller.
- Break and rinse
- Break large clumps with your hands.
- Place pieces in a bowl or colander and rinse under cold running potable water.
- Move pieces around to unsettle sand or small shells. Use your fingers to rub off grit gently.
- Pick out obvious debris
- In a bowl of cold water, use your hands to separate the moss. Remove small shells, stones, or other seaweed types.
- Discard anything that looks odd or feels slimy beyond the expected texture.
- Soak to rehydrate
- Put the rinsed moss in a clean bowl and cover with cold potable water.
- Allow it to soak until soft. Check it every 30–60 minutes.
- Change the water if it becomes cloudy or has floating debris. Repeat rinsing and soaking once more if needed.
- Final rinse and drain
- Once soft and free of visible grit, give a final rinse under running water.
- Drain in a colander. Pat dry if you plan to blend into gel.
Notes
- Do not use hot water for the main soak. Hot water can change the texture and make the moss slimy.
- The time to soak varies by dryness and type. Use texture as your guide: it should be soft and flexible.
Step-by-step: fresh sea moss
Fresh sea moss arrives wet and flexible. It often has attached small organisms or sand.
- Rinse right away
- Rinse under cold potable water to remove loose sand and salt.
- Use a strainer or bowl to handle slippery pieces.
- Remove attachments
- Look for tiny barnacles, shells, worms, or foreign seaweed. Use scissors or your fingers to remove them.
- If you see any small animals, discard that piece.
- Soak briefly (optional)
- If pieces are very salty, a short soak in fresh cold water (10–30 minutes) helps reduce salt on the surface.
- Change the water if it looks cloudy.
- Final rinse and use
- Rinse again, drain, and use immediately or refrigerate/freeze as appropriate.
Notes
- Fresh sea moss can spoil faster than dried. Keep it cold and use soon.
- If you see signs of decay (strong bad smell, slimy film that wipes away with color change underneath), do not use.
Step-by-step: sea moss gel and blended gel
Sea moss gel is often made at home or bought prepared. Gel is already hydrated. It needs clean handling.
- Check the container and smell
- The gel should smell mild. A sour or foul smell can mean spoilage.
- If packaged, check any date or storage instructions.
- Clean hands and tools
- Wash hands and tools before handling gel. Use a clean spoon or scoop—not your hands—unless you wear food-safe gloves.
- Small rinse for impurities
- If you notice sand or debris in gel, scoop it into a fine mesh strainer and rinse under cold water. This is rare if you made gel correctly.
- Store cold and sealed
- Keep gel cold (refrigerator) and use within the time the seller or recipe suggests.
- Freeze portions if you plan to keep them longer.
Notes
- Making gel at home requires the same careful cleaning of the dried or fresh moss before blending.
- Gel has a more limited shelf life than dried moss. Use cold storage to slow spoilage.
How to tell if cleaning worked
Use these checks after cleaning:
- No visible sand, shells, or dirt.
- Texture is soft and flexible for rehydrated moss, not brittle or rock-hard.
- No foul or chemical smell.
- No color that looks like mold or unusual staining.
- For gel: no sour smell, no mold on the surface.
If you still see sand or grit after 2–3 rinses, change the water and try again. If debris consistently remains, consider asking the supplier for a replacement or more information.
Storage after cleaning
- Dried sea moss: Keep dry and sealed in a cool place. Use a clean, airtight package.
- Rehydrated sea moss (if not made into gel): Keep refrigerated and use within a short time. If you plan to keep it longer, blend into gel and freeze in portions.
- Gel: Refrigerate in clean containers. Freeze in small portions for longer storage.
Storage times vary by temperature and handling. When in doubt, trust smell and sight. If an item smells off or shows mold, discard it.
Decision checklist: How to clean based on form and goal
| Sea moss form | Quick cleaning steps | When to ask for lab info or skip |
|---|---|---|
| Dried (loose pieces) | Rinse, pick out debris, soak in cold water until soft, change water if cloudy, final rinse | Ask for supplier testing if you plan to consume large amounts, use for many people, or are concerned about heavy metals or specific mineral levels |
| Fresh (wet) | Rinse under cold water, remove attachments, short soak if very salty, final rinse | Skip batch if it smells bad or has visible rot; ask for origin and storage details if unsure |
| Gel (prepared) | Check smell and packaging, use clean scoops, rinse small debris if present, store cold | Ask for production date and storage conditions; request lab results if used in a commercial product or for vulnerable users |
| Powder or capsules | Inspect packaging seals, check for odd clumps, follow supplier storage; typically no home “clean” step | Ask for third-party lab certificates for contaminants, potency, and iodine content before buying for sensitive users |
This table is a practical guide. It does not replace supplier transparency or lab testing.
When to ask for lab data or decline a batch
Ask the seller for lab reports when:
- You plan to sell finished products made from the sea moss.
- You are buying wholesale or in bulk.
- You have health needs that require low iodine or other nutrient limits.
- You see repeated visual or smell problems.
- You want reassurance about heavy metals, pesticides, or microbial testing.
What lab reports can (and cannot) show
- Lab tests can report measured levels of specific compounds and contaminants. They do not guarantee future batches are the same unless the seller tests each batch.
- A lab report is useful evidence but check the date, scope, and lab accreditation.
- If a supplier declines to share batch testing or clear sourcing, treat that as a reason to ask more questions or choose another source.
Practical tips for buying cleaner sea moss
- Choose sellers who share photos and batch details and who will answer questions about processing.
- If you buy dried, check packaging dates and storage instructions.
- For bulk or commercial use, require lab testing and a certificate of analysis.
- Use the initial smell and look test when the package arrives.
Conclusion
Cleaning sea moss is simple for most home uses. Rinse, soak, and pick out visible debris. These steps remove grit, loose shells, and surface salt. They do not prove a product is free of chemical contaminants or high mineral content. When you need that proof — for large purchases, commercial use, or sensitive health reasons — ask for batch testing and clear supplier answers. Use the checklist and the decision table here to pick the right cleaning method for dried, fresh, or gel formats.
If you’d like to learn more about seaweed basics, safety, and uses, visit our learning hub at Learn (/learn/). To see our product formats, check Shop (/shop/). For bulk orders, visit our Wholesale (/wholesale/) page. If you have questions about an order or a batch, Contact (/contact/) us or visit Home (/) for general info.
Frequently asked questions
Can I use soap or vinegar to clean sea moss?
Do not use soap or household cleaners. Soap can leave residues and change taste. A mild vinegar rinse is not recommended as a routine step. Vinegar can change texture and does not guarantee removal of chemicals or metals. Use clean potable water and manual sorting as the main cleaning steps.
Will rinsing remove iodine from sea moss?
No. Iodine is often part of the seaweed itself and not just on the surface. Rinsing may remove some surface salt, but it cannot reliably lower iodine to a known level. If you need low-iodine intake, ask a seller for lab results or consult a health professional [2][5].
How can I tell if sea moss is spoiled?
Bad smell (sour, rotten, chemical), visible mold, or a slimy film that does not look like expected texture are signs to discard. If an unopened, sealed product shows internal mold, do not use it and contact the seller.
Does cleaning remove heavy metals or microplastics?
No. Simple home cleaning cannot remove heavy metals, many chemical residues, or microplastics embedded in the seaweed tissue. If these are a concern, request third-party lab testing or choose tested products.
How should I store cleaned sea moss?
Dried moss: keep dry and sealed. Rehydrated moss or gel: keep refrigerated, use within recommended times, or freeze in portions. Always use clean containers and utensils.
Should I buy from suppliers who share lab reports?
Yes. For bulk purchases, commercial use, or if you have health concerns, prefer sellers who share recent batch testing and transparent sourcing. Lab reports give measurable information you cannot get by washing at home [4].
References
- [1] Harvard T.H. Chan School of Public Health, “Seaweed.” https://nutritionsource.hsph.harvard.edu/seaweed/
- [2] Smyth PPA. “Iodine, Seaweed, and the Thyroid.” European Thyroid Journal, 2021. https://pmc.ncbi.nlm.nih.gov/articles/PMC8077470/
- [3] Food Standards Australia New Zealand, “Survey of iodine levels in seaweed and seaweed containing products,” updated 2025. https://www.foodstandards.gov.au/science-data/monitoring-safety/surveyofiodinelevels
- [4] Operation Supplement Safety, “Sea Moss in Dietary Supplements.” https://www.opss.org/article/sea-moss-dietary-supplements
- [5] Blikra MJ et al. “Consequences of acute and long-term excessive iodine intake: A literature review focusing on seaweed as a potential dietary iodine source.” 2024. https://doi.org/10.1111/1541-4337.70037